Viewing entries in
recipe

1 Comment

Coconut Banana Bread with Lime Glaze [Wenatchee food photography, Washington]

Always in search of a way to use the last few bananas, I was happy to stumble upon a twist on the old classic banana bread. This Coconut Banana Bread with Lime Glaze from Cooking Light was just the ticket. It goes together pretty simply, like good quickbreads do, and the lime glaze is super easy and super tasty. Sweet and tangy, these two ingredients make a tremendous difference to this kitchen staple. Recipe below with my modifications noted.

Coconut Banana Bread with Lime Glaze
2 cups all-purpose flour
3/4 teaspoon baking soda
1/2 teaspoon salt
1 cup granulated sugar
1/4 cup butter, softened
2 large eggs
1 1/2 cups mashed ripe banana (about 3 bananas)
1/4 cup plain yogurt (I used sour cream)
1/4 cup milk
1/2 teaspoon vanilla
1/2 cup + 1 tablespoon flaked sweetened coconut, divided
1/2  cup chopped, pecans (I toasted mine first)

Glaze:
1/2 cup powdered sugar
1 1/2 tablespoons fresh lime

Preheat oven to 350°.

  1. In large bowl, beat together sugar and butter until well blended.
  2. Add eggs, banana, yogurt, milk and vanilla; beat until blended.
  3. Add flour mixture and beat just until moist. Stir in 1/2 cup coconut and pecans.
  4. Spoon batter into a 9 x 5-inch loaf pan coated with cooking spray; sprinkle with 1 tablespoon coconut.
  5. Bake at 350° for 1 hour or until a wooden pick inserted in center comes out clean. Cool in pan 10 minutes on a wire rack; remove from pan to serving plate.
  6. Combine powdered sugar and lime juice, stirring with a whisk; drizzle over warm bread.

My notes: I made this into 2 smaller loaves and doubled the glaze recipe so I could add glaze to both loaves. Because of my smaller loaf size, my total cooking time was 50 minutes. I checked it at 40 and the top and coconut was getting brown, so I covered the top with aluminum foil to prevent over-browning.

1 Comment

Comment

Sunny morning muffins [Wenatchee food photography, Washington]

When I have something left in the refrigerator that is just about past its shelf life, I always try to find a recipe that I can make to incorporate the ingredient so they don't go to waste. I get the biggest thrill out of "making something from nothing," so when I had a big handful of strawberries that weren't so pretty anymore, meaning the kids wouldn't be eating them, I went looking for a recipe that could use them. I love the internet, being able to type "strawberry recipes" and finding so many links quickly is nice. This recipe for Sunny Morning Muffins sounded good and I thought I could cheat a little and make them on a Friday night because it meant I could wake up Saturday morning and eat them without having to cook first, which for me = a much sunnier morning. Wenatchee has this bad habit lately of being sunny and beautiful Monday-Friday and then rainy all weekend. I thought maybe with something as sunny sounding as these muffins that I could sway the weather gods into sending a few of those golden rays our way when we could actually be outside to enjoy them. Long story short, I made the muffins, but we still woke up to grey skies. Nothing dark and ominous, but it has been raining off and on anyway. Weather aside, these muffins are pretty tasty and helped turn the grey day a little warmer. The recipe is at the link above, but I will add that they didn't include quantity (mine made 16) and the lemon zest flavor is pretty strong using the whole lemon as indicated. You might consider using less if it's not your favorite flavor. Here's to sunny mornings!

[edit: Since I posted this, I wanted to add that these were really good right out of the oven. But after sitting in a more airtight setting, the tops got a bit wet. The muffins were moist, but the tops were too moist and a bit unappealing. I later saw several comments on the original recipe post (link above) that mentioned something similar. Just wanted to give a heads up that these are probably better made and eaten the same day.]

Comment

Comment

Pumpkin pie cupcakes [Wenatchee food photography]

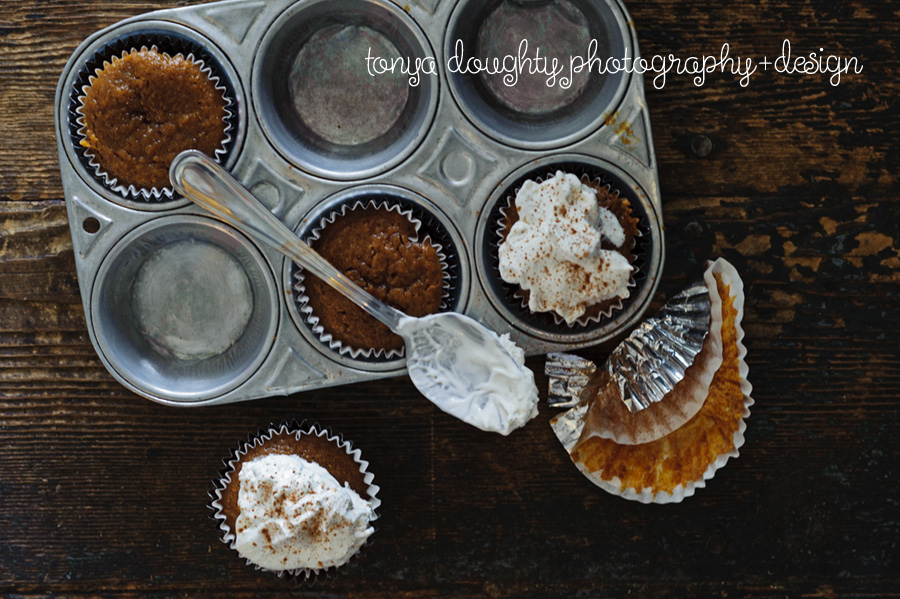
My oldest little recently requested pumpkin pie cupcakes and being as I've never heard of such a thing, we decided to look for a recipe. I found several for pumpkin cupcakes, which I had a feeling would be too cakey for her as she was wanting more of the pie flavor without actually being pie. I found a recipe that looked like a good place to start and with a few tweaks, we came reasonably close. We added the surprise of a gingersnap cookie as a base to the cupcake for a bit of extra spice. They had the right flavor, were slightly creamy and dense, and with whipped cream and a sprinkle of extra cinnamon, they were a pretty good rainy day dessert. Our Spring has certainly been Fall-like with its cool temps and frequent rain, so these fit right in, despite the normal Autumn association that pumpkin has. Recipe below image.

Pumpkin pie cupcakes

1-1/3 cup all purpose flour
1/2 teaspoon baking powder
1/2 teaspoon baking soda
1/2 teaspoon salt
1 tablespoon pumpkin pie spice
1 teaspoon cinnamon
1 teaspoon ginger
1 teaspoon cloves
1/2 teaspoon allspice
1/2 teaspoon nutmeg
1 29-oz can pumpkin puree (not pumpkin pie mix)
1 cup sugar
1/2 cup brown sugar
4 large eggs
2 teaspoons vanilla extract
1 cup sweetened condensed milk
1/2 cup milk
Small, round gingersnap cookies that will fit in the cupcake liners.

Preheat the oven to 350F. Makes about 24-30 cupcakes. Line muffin tins with paper liners and place one gingersnap in the bottom of each liner.

  1. In a medium bowl, whisk together flour, baking powder, baking soda, salt and all spices.
  2. In a large bowl, whisk together pumpkin puree, sugar, brown sugar, eggs, vanilla, sweetened condensed milk and milk until well combined.
  3. Add in dry ingredients and whisk until no streaks of flour remain and batter is smooth.
  4. Fill each muffin cup to just below top of liner. These cupcakes sink when cooling because of the creamy consistency so will end up being fairly flat on top.
  5. Bake for 20-22 minutes. Cool cupcakes in pan then transfer to refrigerator once they're at room temperature.
  6. Serve chilled and topped with lightly sweetened whipped cream and a sprinkle of cinnamon.


Comment

Comment

Perfect spicy chocolate cake [Wenatchee food photography]

Craving chocolate cake after a friend mentioned SHE was craving "warm chocolate cake", I decided Thursday night was a perfectly acceptable time to stop everything and bake one. Knowing it would only be warm for that short time after baking, I decided to give it its own heat with a little kick of spice. I combined my favorite "go-to", easy-peasy, (one bowl!) chocolate cake recipe (Hershey's Perfectly Chocolate Cake) with an uncommon ingredient: cayenne pepper. Often used in a spicy flourless chocolate cake, I figured it couldn't hurt this old-fashioned staple. Not super spicy, just enough to give a little hit of lingering flavor. (And if the idea of cayenne in your chocolate cake doesn't appeal to you, you can omit it and it's still a really good chocolate cake made in one bowl. ONE BOWL. What could be better?) Recipe below image.

Perfect spicy chocolate cake

2 cups sugar
1-3/4 cups all-purpose flour
3/4 cup HERSHEY’S Cocoa
1-1/2 teaspoons baking powder
1-1/2 teaspoons baking soda
1/2 teaspoon cayenne pepper
1 teaspoon salt
2 eggs
1 cup milk
1/2 cup vegetable oil
2 teaspoons vanilla extract
1 cup boiling water

  1. Heat oven to 350°F. Grease and flour two 9-inch round baking pans.
  2. Stir together sugar, flour, cocoa, baking powder, baking soda, cayenne pepper and salt in large bowl. Add eggs, milk, oil and vanilla; beat on medium speed of mixer 2 minutes. Stir in boiling water (batter will be thin). Pour batter into prepared pans.
  3. Bake 30 to 35 minutes or until wooden pick inserted in center comes out clean. Cool 10 minutes; remove from pans to wire racks. Cool completely. Frost with Perfectly perfect chocolate frosting (below). 10–12 servings.

Perfectly perfect chocolate frosting
1/2 cup (1 stick) butter or margarine
2/3 cup HERSHEY’S Cocoa
3 cups powdered sugar
1/3 cup milk
1 teaspoon vanilla extract
Melt butter. Stir in cocoa. Alternately add powdered sugar and milk, beating to spreading consistency.
Add small amount additional milk, if needed. Stir in vanilla. About 2 cups frosting.

Comment

2 Comments

Beer bread by request [Wenatchee food photography]

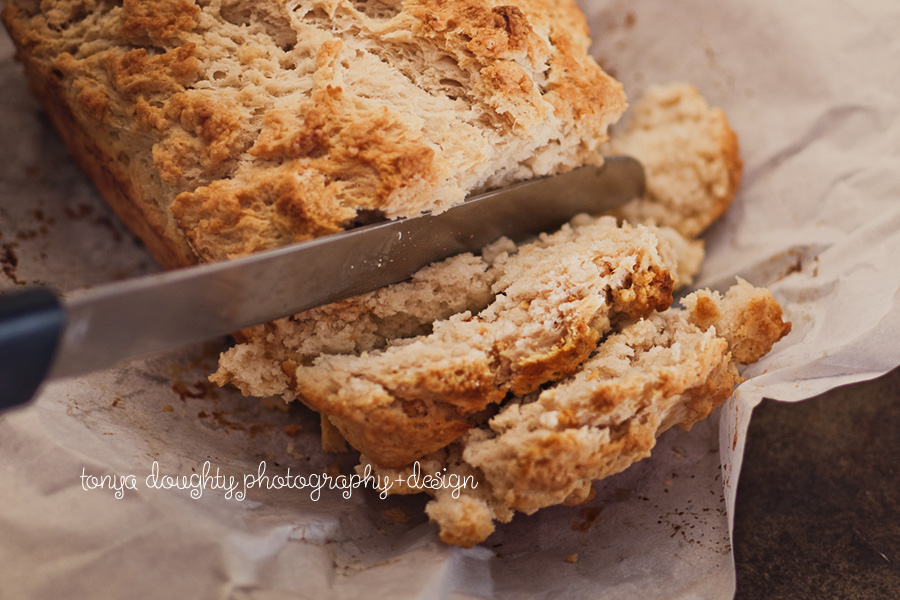
I had a couple requests for the beer bread recipe I blogged about recently so thought I'd pass that along. It's so simple, and has been part of my family for so long (I learned from my mom) that I kind of forget not everyone knows this by heart already. You'll see how simple it is, make it once, TASTE it once and be forever hooked when you want a fast, hearty, flavorful bread. You can taste the beer a bit (I hate beer and it doesn't bother me) so use something lighter if you don't want so much flavor or try something stronger if you're an afficianado of all things beer! I also used the last two pieces to make a fantastic grilled cheese sandwich, so save a bit for that! Recipe below image.

Beer Bread

3 cups sifted, self-rising flour (important to sift with this recipe to keep bread from becoming hard like a brick!) 

1/4 cup sugar

1 (12 ounce) bottle of beer

1/2 cup melted butter, divided in 2


Preheat oven to 375 degrees.

  1. Mix self-rising flour, 1/4 cup sugar, 1/4 cup melted butter and beer and pour/spread into a greased loaf pan. It will be thick.
  2. Pour remaining ¼ cup melted butter over top of dough.
  3. Bake 50-60 minutes, let cool in pan about 10 minutes, remove from pan and cool at least an additional 15 minutes.

Beer Bread

3 cups sifted, self-rising flour (important to sift with this recipe to keep bread from becoming  brick!)

1/4 cup sugar    

1 (12 ounce) can beer

1/2 cup melted butter, divided in 2


Preheat oven to 375 degrees.

1.       Mix dry ingredients, ¼ cup melted butter and beer and pour/spread into a greased loaf pan. It will be thick.

2.       Pour remaining ¼ cup melted butter over dough.

3.       Bake 1 hour, remove from pan and cool for at least 15 minutes.

2 Comments