Viewing entries in
before and after

Comment

Before and After: Wenatchee couple portrait

Two weeks in a row! I'm on a roll. Kaiser please. Anywho...

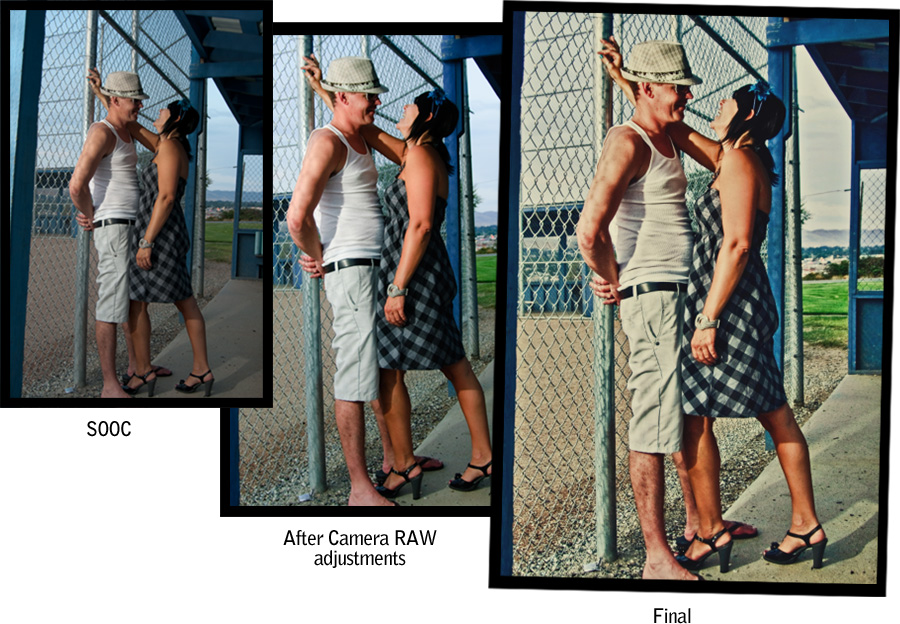
For this photo I was directing my valuable assistant and VAL (voice activated light) to cast a little light their direction. It was getting pretty late, nearly 8:30 pm, and being in a dugout, I needed the assist to keep the faces out of shadow. In retrospect, I could have (should have?) put a reflector behind her to pop a little more light onto his face. As it goes though, I like the result as her laughing expression is really the point and that's where the light falls. I made a few adjustments in Adobe Camera RAW to crop a tiny bit and straighten for better composition. In Photoshop I decided to just "play" with this photo and tried a whole lot of different things. In the end the stuff I kept were a black and white adjustment layer that I lowered to tone the color down, Topaz Adjustment filter on "Photo Pop", lowered to 75%, a warm photo filter for, yea, you guessed it, warmth, highlight and shadow separator actions from TRA actions, highlight recovery in Photoshop, a bit of noise reduction on the blue channel in LAB mode, and finally the Lux (soft) action at 90%, also from TRA. Phew, that's a lot, and not something I would do for a whole event's worth of photos, but it was fun to play around and do something a little different.


Comment

1 Comment

Before and after: Wenatchee portrait

Another before and after of a shot I made last night. Like always for portraits, I capture in RAW. This was aperture priority at f/5.6, 1/40, ISO 250, auto white balance. Important to note the +2 exposure compensation to help the matrix metering better account for the bright sky. Could have also used spot or center-weighted metering on his skin. Always more than one way to skin a cat, as the (oddly gross) saying goes.

In Adobe Camera RAW I cropped and straightened just a bit, adjusted the white balance for warmth (5550, -10) and to remove some of that redness Nikon seems prone to, took the exposure down 1/3 stop, recovered some of the highlights (53) and bumped up the contrast (+48).

Once in Photoshop I did a little standard noise reduction using Topaz DeNoise from within Topaz Adjust and added a bit more contrast and saturation. I ran three ColorShift (Jesh de Rox) actions: Color of summer (50%), Memory of a Friend (40%) and Rainforest (40%) which I then masked, leaving the warm tones on his skin and the cooler rainforest tone everywhere else. Sharpened to taste for screen presentation. Took about 5 minutes total. Not a huge transformation but a nice one I think.


1 Comment

Comment

Wenatchee senior portrait: Before and After

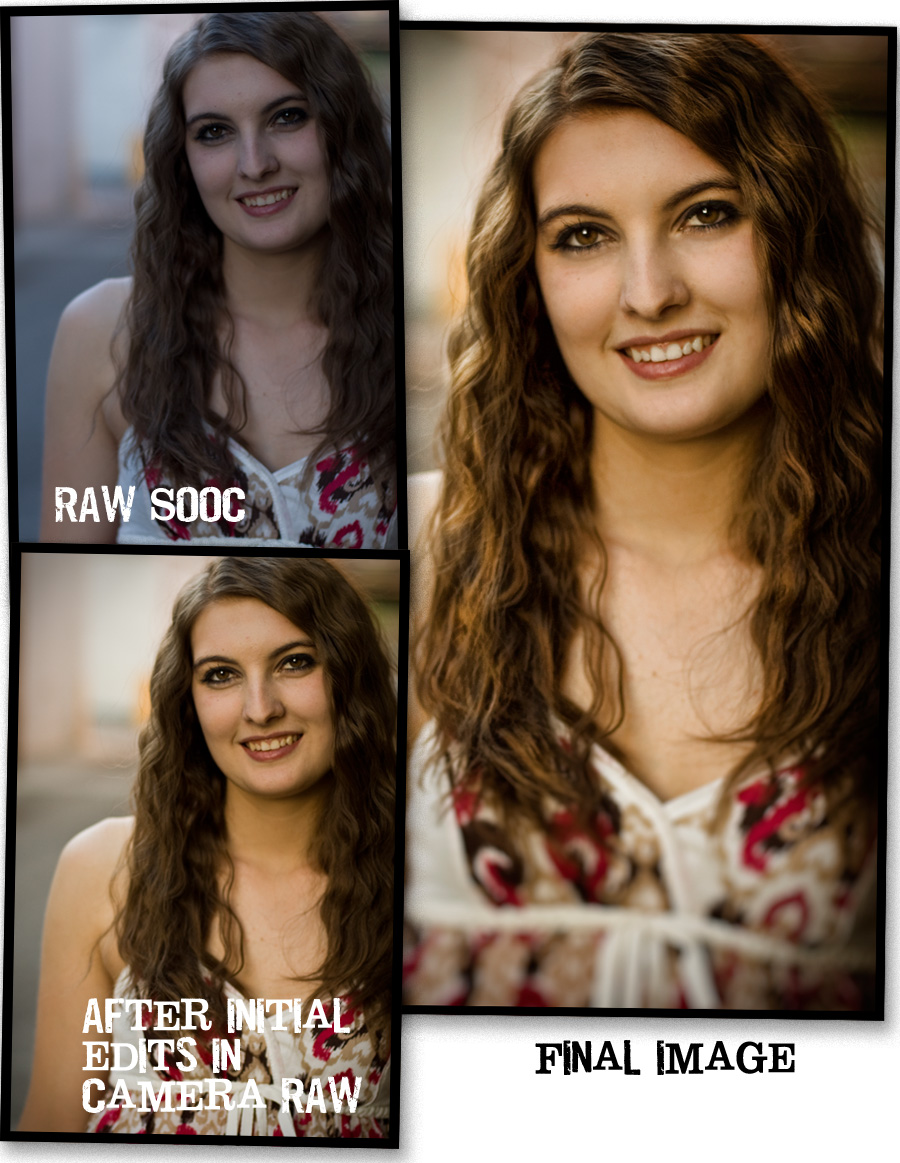
Well, the best laid plans...I said I would really try to do a Before and After every Wednesday and then managed a whole...one. The problem was honestly that I forgot, plain and simple. It isn't a habit yet, so never occured to me again until I saw my old post that included the first one and realized I'd fallen off the wagon, so to speak. This is why New Year's resolutions never work for me. I literally forget I made them until, like April. So while I'm thinking about it, I'm doing one now (Monday night) and setting it to publish Wednesday a.m. Ha ha, I feel like I'm talking to the future.

In this photo you can see the RAW SOOC version, exactly as it was captured. Below it is the RAW file with it's basic adjustments set in Camera RAW. I shoot everything in RAW with Auto white balance (except sports, where I shoot JPG with a custom white balance) because the beauty of RAW is being able to choose the best white balance in processing, fine-tuning as desired. So you really see the light's color difference between the two shots. Once opened in Photoshop, I really did very little. I added contrast to the different values in her hair (making some of the lights lighter and darks darker for contrast.) I also lightened what I'll call the "bags" under her eyes - although they aren't really bags, like dark circles or anything. It's common in a lot of young people, that fresh little pad of fat that defines the eye. I actually love it in real life, but when you photograph someone with dark eyes, like she has, it tends to close up the eye area making them appear like dark holes in the head. I lighten them (don't remove alltogether or it looks fake) and brighten up the eyes a bit for emphasis. I also added a subtle vignette and some selective bluring in the lower part of the photo to put more emphasis on her beautiful face. A couple small blemishes were sampled out and the whole process took just a couple minutes.

Comment

1 Comment

Before and After: Wenatchee child photography

Bobby Earle is a photographer in San Diego whose work I greatly admire. And I'll tell you, yes, he is a fantastic photog, but I love him for more than his photography. He has a great attitude about life and photography and his passion for his beautiful wife (who you can tell is his best friend) all point to him being a really well-rounded, awesome guy. He does this thing called "Before and After Wednesdays" where he posts an SOOC (straight out of the camera) image and then shows you how he processes it to get his look. I think it's a great idea because ALL of us, would be nowhere without someone, at some point showing us something we didn't know. We all learn from everyone else, not just in photography, but life in general. I know I get asked a ton of "how do you..." questions and I am passionate about sharing whenever I can. So while I can't pinky-promise I'll manage to do this every Wednesday, I am going to TRY.

This is an old photo, from 2005, but one I really love. It makes me laugh everytime I see it. I am a firm believer that good post (post processing) is necessary (read here ALL about it) and can really help a so-so image. I don't think that is the case here (I mean I don't think this is a so-so image), as I think this is a pretty decent SOOC. Exposure is good, focus good, lighting not bad. Just needs a little...like icing on the cake, KWIM? So this one isn't being "rescued", so much as "finished."

Here is the SOOC version:

and here is the finished version.

And here is what I did to get it. (Click to enlarge.) In this case, these are all TRA actions, though I also use a ton of my own "stuff" and I like ColorShift too. There are so many out there and I own a lot of them to round out my own workflow, but seem to really use these the most.

1 Comment

1 Comment

Before and after: Candid portrait photography

A recent post at Shutter Sisters, one of my favorite photography sites, asked to see some "before and after" images. Before, meaning how an image comes "right out of the camera", and after, being after processing. I know a lot of you will now say "What? Digital images don't need processing. There's no film. They're d-i-g-i-t-a-l." Well, here is my two cents worth:


There are a lot of things I would consider myself passionate about. In photography, the most important message I wish I could convey, in the sense that I view photography as an art form, is that the part of the process that we call post-processing, or digital darkroom or maybe even as simplistic as "enhancement" is 100% absolutely vital, necessary and required. A photograph is not "done" until it shows not just what the photographer saw, but how the moment felt. I am done when I look at the photo and say "yes! that is exactly what it was like when I was there, making that photograph." Now, this doesn't mean that every single photo is processed to the same degree. Sometimes the way it looks with minimal post (post-processing) is the way it felt. Sometimes extreme measures are needed to "extract", if you will, the moment from the confines of it's frame. In my opinion, photography as an art form is completely different than photo-journalism, when the photographer is directed to show it exactly as it was at the time of capture. No removing extraneous elements, and of course, taboo, no adding anything.


But guess what even photo-journalists do? They still post-process an image. Why? Because cameras (digital or film) can only capture the scene to the degree that human technology has manufactured the equipment to work. An image captured today with a top-of-the-line DSLR is a far cry from a pinhole camera or a point-and-shoot or a polaroid or even the huge cameras from the early 1900's and yet each of these produce images that will still need some amount (a little or a lot) of "tweaking". The photo-journalists, yes, they can't add or subtract or change the mood of a photo, but they still adjust the contrast or sharpness or crop because, I'll say it again, cameras can only capture the scene to the degree that human technology has manufactured the equipment to work. And currently (and maybe forever) that equipment is not as good as the good ole' human eye. Nothing beats realism like being there.


And did you know that in reality a large part of the decisions you make about an image are made before you even take the image? We "post-process" pretty much before we push the button, so really, we pre-process as well. You find a nice background, or say "OK, smile" (please don't ever say that, LOL) or even ask the subject to "wear something nice". You decide the technicalities of shutter speed and ISO (film speed) and f-stops and lens length, all in a calculated attempt to make the image the WAY YOU WANT. Now, I do think the more time you spend learning and DOING photography the more often you get closer to what you want "in camera", thanks to all that pre-processing. I don't think anyone with any technology available now or in the future will ever get to the point that they can click the button and be done with it. Click. Perfect image. Click. Perfect image. And do you know why? Because we are HUMAN, and thus, subject to emotion and capable of love and hate and passion and indifference. That quality is what will always make post-processing a necessary part of photography. Ansel Adams, easily considered one of the best landscape photographers ever did not take perfect photos. He MADE perfect photos by choosing location, timing, equipment, settings and how he processed his film and made his prints. All fall into the heading of “processing.” Again, a photograph is not "done" until it shows not just what the photographer saw, but how the moment felt.


Below are a couple of my before and afters to show how some images required very little post for me to be happy with them and some, so much more. The end result is the same: A moment captured that reflects so much more than just what was going on at the time.


1 Comment